High-volume off-road tires provide the necessary grip for young riders to roll confidently over every surface.
Capable, confident and grippy
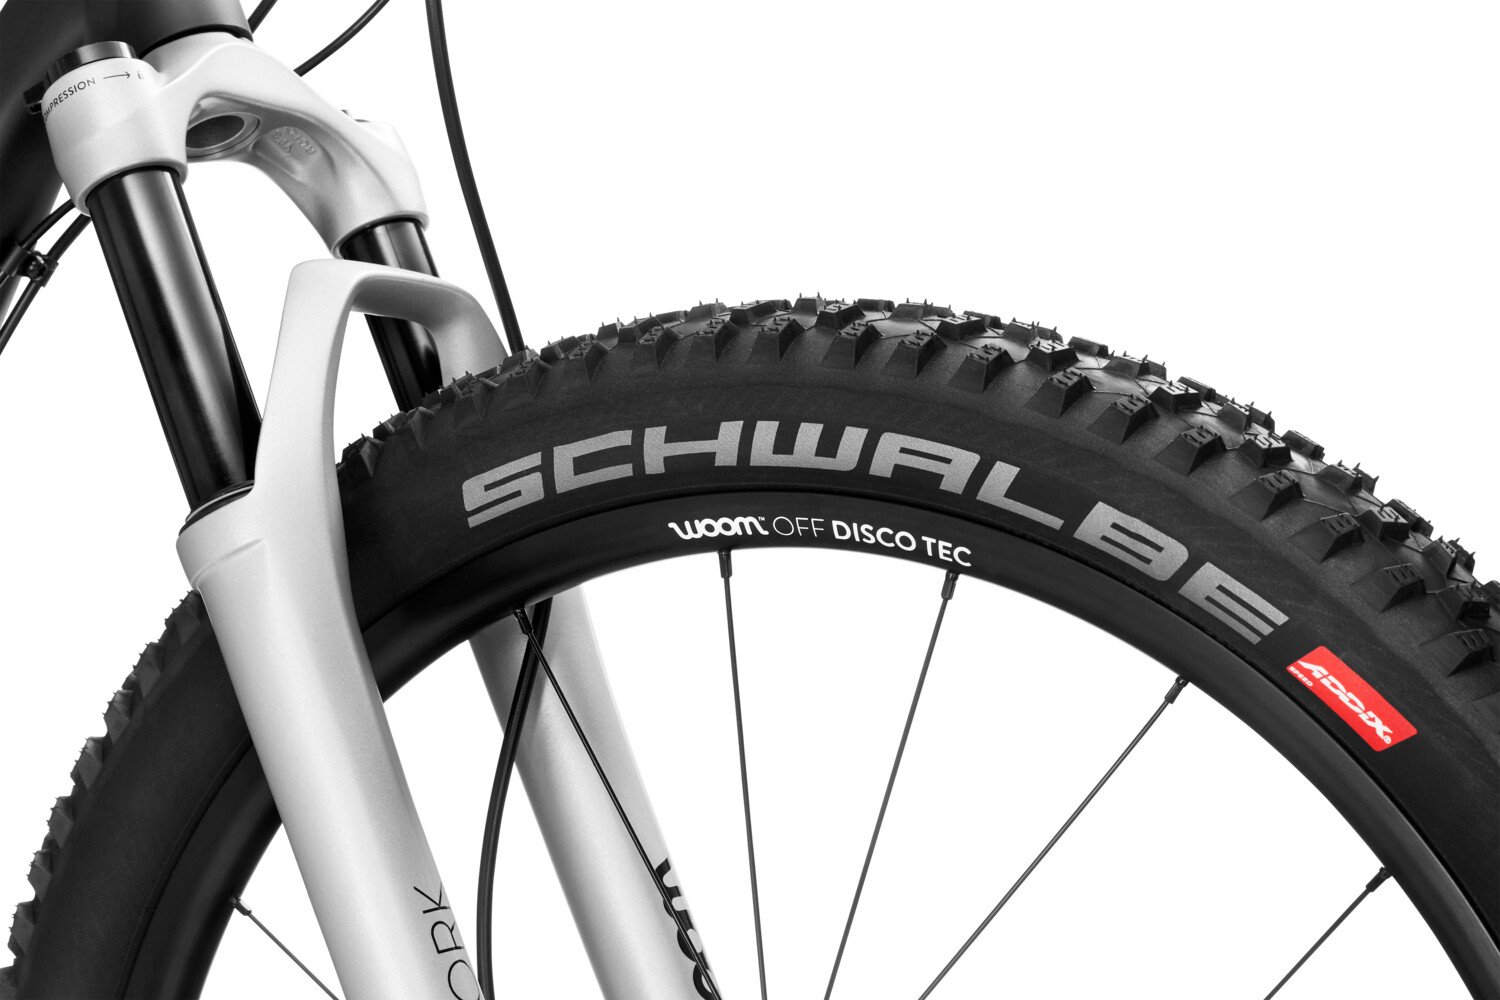
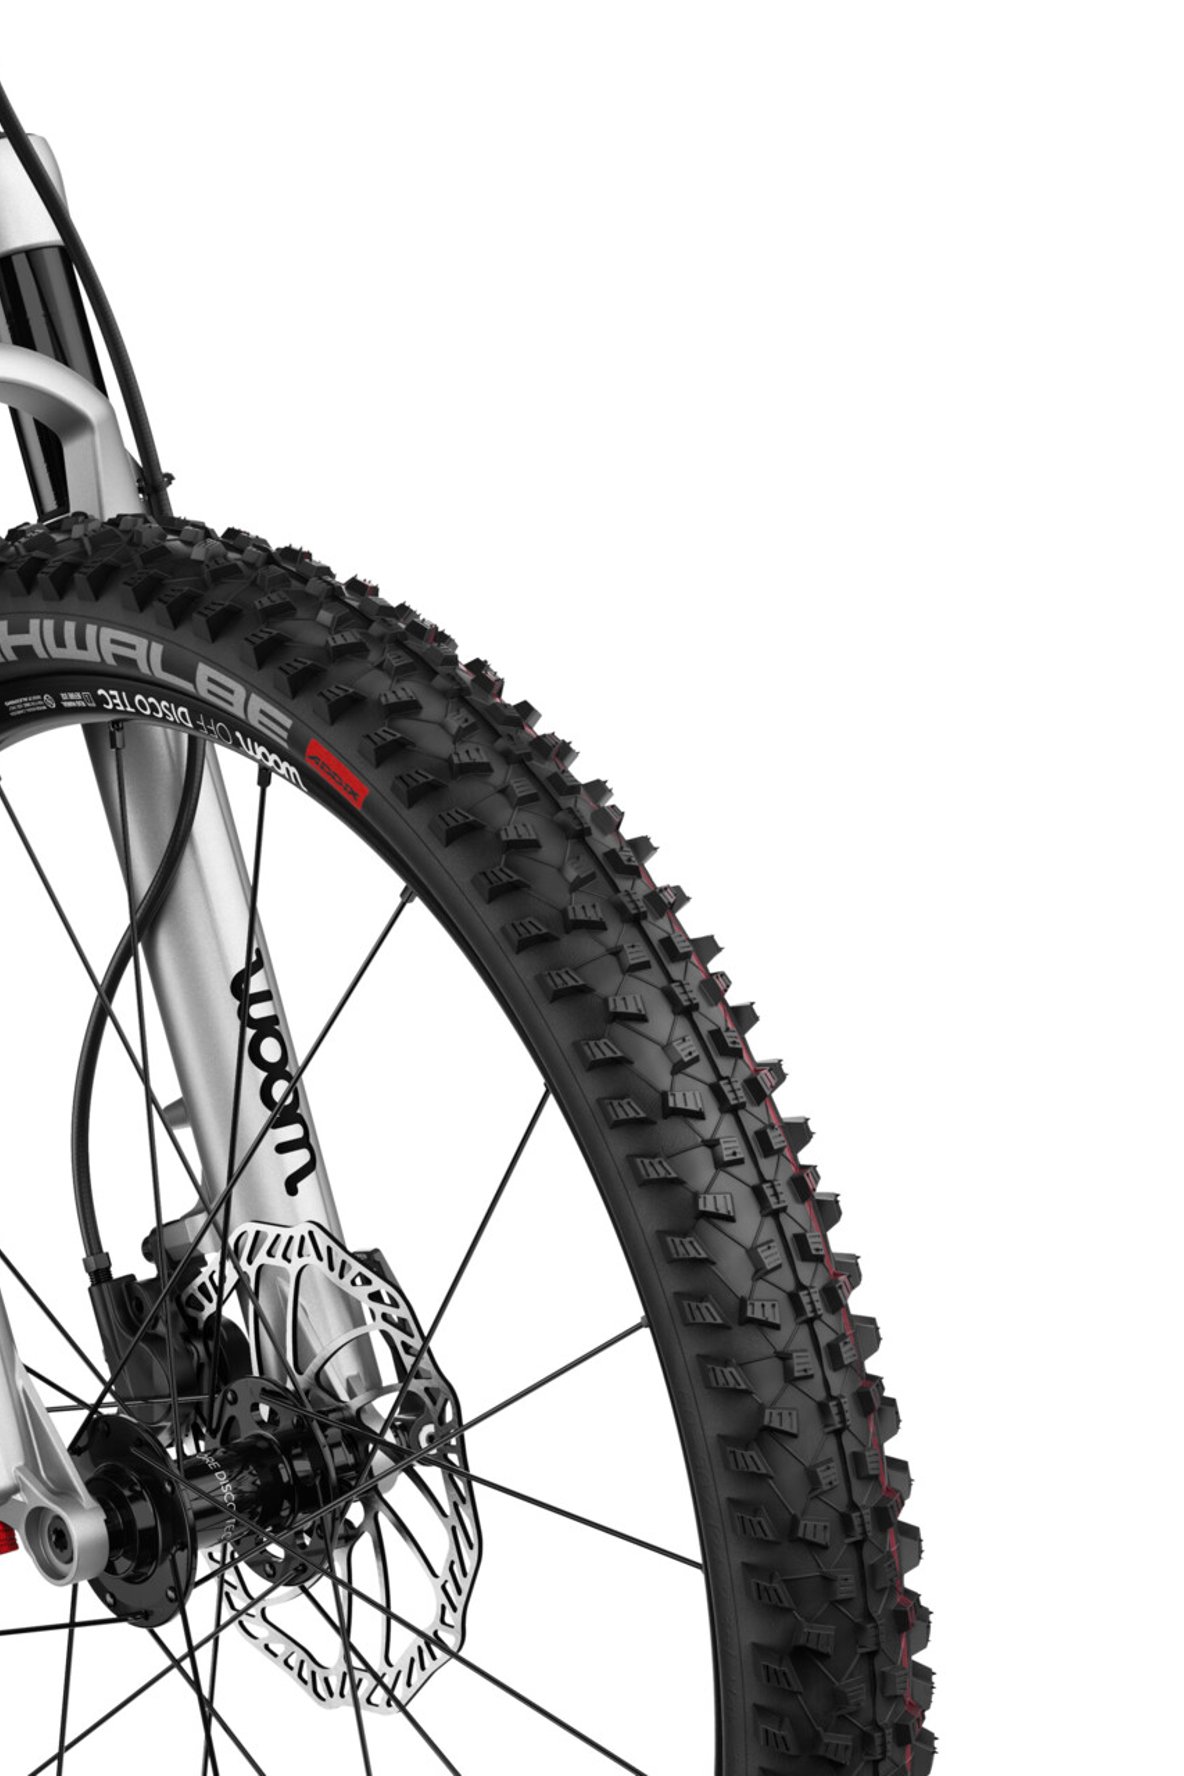
The choice of tires on your mountain bike can make your ride more comfortable and grippier on rough sections and steep gradients. It comes down to a number of factors, including their tread pattern, which you want to be wide and aggressively profiled in order to maintain traction over roots and rocks.
With a high volume, these tires not only get a larger contact patch but also provide added stability and damping out of trail vibrations.
This is because they can be run with higher tire pressures, which minimizes rolling resistance. Naturally, the optimal tire pressure is dependent on the rider's weight and the terrain. But at the same time, a tire run at a lower pressure is able to absorb more bumpiness than a tire at a higher pressure, which further increases comfort over rough ground.
Combined, these tires hit the sweet spot of grip, comfort and rolling resistance to so that kids get a safer and more confidence-inspiring ride that'll encourage them to play and take on new, fun trails.
Our high-volume tires in detail:
- Schwalbe Rocket Ron tires with ADDIX SPEED
- Low rolling resistance and maximum grip
- Great cushioning ability
- Size OFF 4: 20 x 2.25″, fits woom OFF/OFF AIR 4
- Size OFF/UP 5: 24 x 2.35″, fits woom OFF/OFF AIR/UP 5
- Size OFF/UP 6: 26 x 2.35″, fits woom OFF/OFF AIR/UP 6
How do I know what tire pressure to run?
If there's one thing to do before your next mountain bike ride, it's set the correct tire pressure. But, you might cry, what's correct, and how do we find an individual's precise air pressure sweet spot for grip, cushioning and stability?
There's no definitive answer, unfortunately. As mentioned, tire pressure is all about the individual . On the tire's sidewalls you'll see the recommended minimum and maximum pressure values, so this makes your baseline window. From here, you consider a number of other factors, like your child's weight and what sort of terrain, riding, and conditions are on the menu.
To get a stable and comfortable ride, we suggest getting your child on the saddle so that you can tune the tire pressure – with their weight on the bike, look for a very slight tire drop of around 15%. This way, the tire can provide great grip on diverse terrain while nicely cushioning the bike as it conforms to the irregularities of the surface.
Top tip: set the bike up with a fairly high baseline pressure. Ask your child to do a small test loop, including corners, braking and riding over a range of surfaces and bumps. See how the bike behaves and feels, then make small incremental changes until it feels like you've found the air pressure sweet spot.
Encourage your child to think about grip and stability. Does it feel a little wallowy and unstable while cornering and at a high speed? Does it feel like it's bottoming out over roots, rocks or kerbs (i.e. touching the rim)? If yes, add some tire pressure!
Why riding tubeless rocks
Our latest generation of the woom OFF and woom OFF AIR mountain bikes – those released since 2023 – come with tubeless-ready wheelsets. This indicates that you can set them up to be ridden without an inner tube, hence the term "tubeless."
We turned to our product manager Lisa, who was responsible for the development of this newest generation of woom mountain bikes, to explain the benefits of riding tubeless:
"Tubeless tires can be run with a lower pressure so they're able to provide a lot more grip, which is exactly what a child needs when they're riding in the hills and hitting the trails."
To support you in the transition to tubeless, we've put together a step-by-step guide.
Note: If you have any doubts about this process (or anything else related to your woom MTB), we recommend asking a professional bike mechanic to carry out such work.
To go tubeless, you'll need a standard tubeless kit of your choice, including sealant, tubeless rim tape and two tubeless Presta valves. Please note that the rims on the woom OFF and woom OFF AIR have a width of 25 mm. The rim tape should be between 25 mm and 30 mm in width. The valves should be tubeless-ready and no shorter than 40 mm. You can get tubeless kits that include all of these parts from various brands, including Schwalbe.
Here's what you need to do:
- Let the air out of the tube for your front wheel, remove the wheel, take the original tire off and remove the tube.
- Stick rim tape around the entire rim bed. Start around 10 cm before the valve hole and make sure you overlap this area twice. You can also double layer the rim tape all the way around for added airtightness.
- Put your valve in. To do this, feed the valve through the rim tape from the inside of the wheel. Add the lock nut and sealing rubber onto your valve and tighten from the outside.
- Now it's time to add your tires. Begin by placing one sidewall of the tire onto the rim bed all the way around the wheel. Now fit the second sidewall. If possible, use your fingers for this part. Avoid tire levers due to the risk of damaging the rim, the tire bead, or where the tire presses against the rim.
- Once your whole tire is sitting well on the rim, you will want to pump it up. The audible pop you will hear is the sound of the tire bead sealing onto the rim.
- Moving onto sealant, here you have two options: You can pour the sealant into the tire before you insert the second side of the tire. Alternatively, you can insert the sealant into your tire through the valve using a sealant syringe after pumping it up. To remove the valve, you will need a special valve key.
- Repeat the process for your rear wheel.
- Once both wheels are done and remounted onto the bike, your child should have a ride on their woom OFF or woom OFF AIR to check the tire pressure and ensure the sealant is well distributed.